
The holiday season is a time for gathering loved ones, enjoying delicious treats, and surrounding ourselves with festive cheer.
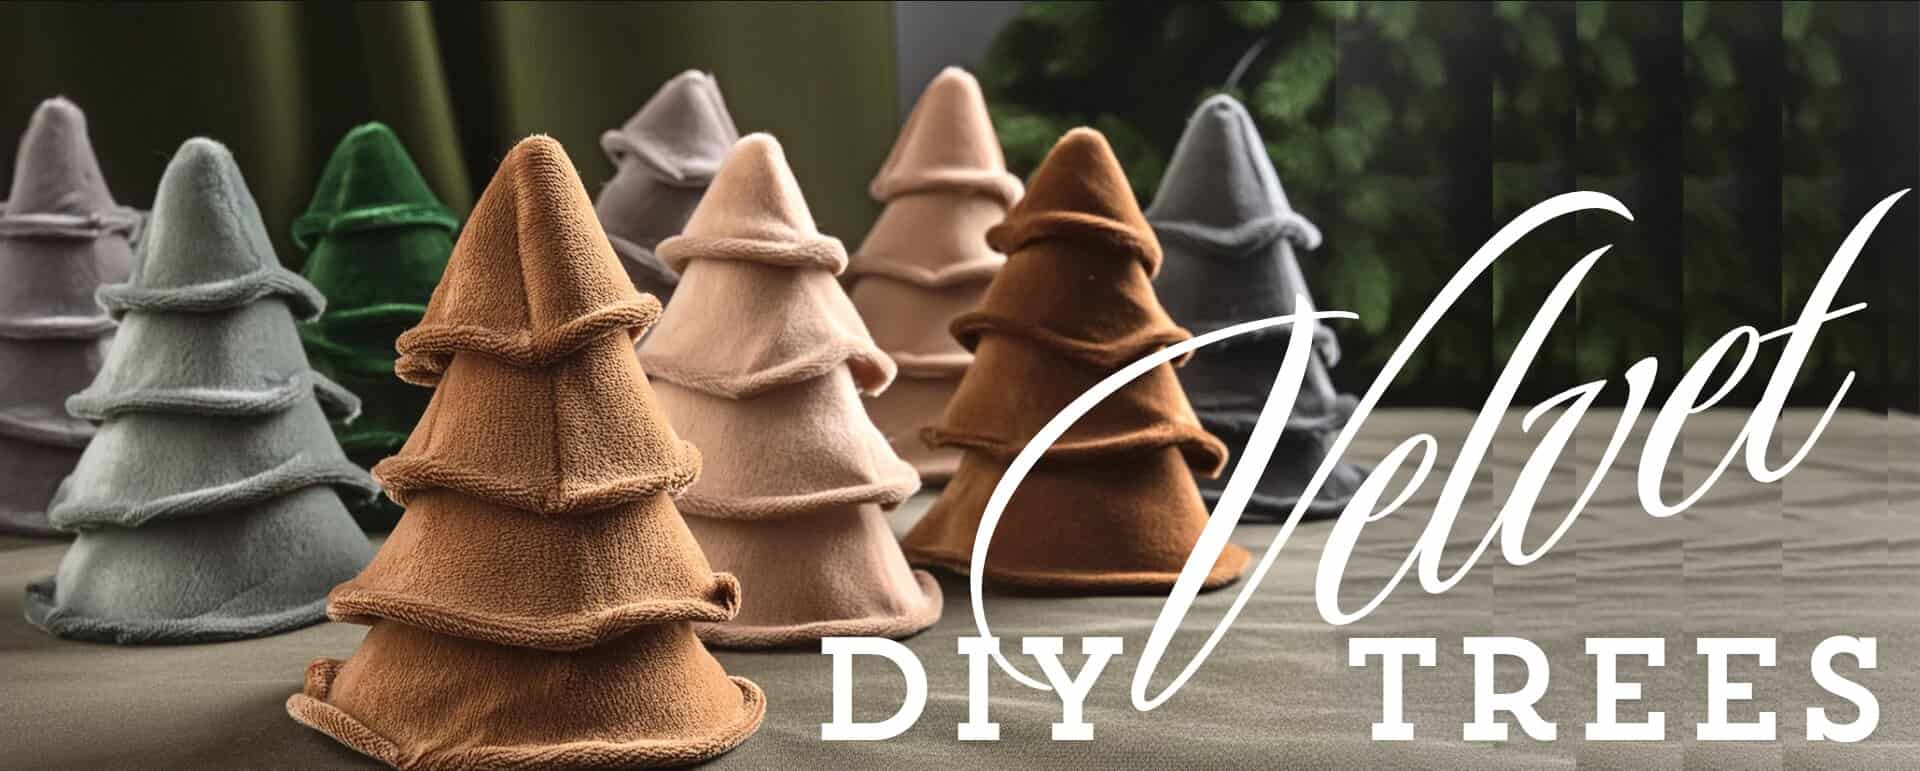
If you love crafting and want to add a unique touch to your holiday decor, follow this simple guide to create your velvet trees. And what better way to elevate your holiday décor than with these luxurious DIY velvet trees? These handcrafted beauties add a touch of elegance and sophistication to any holiday display, making them a perfect addition to your mantelpiece, side tables, or even as part of a festive centerpiece.
Plus, if you're looking for the perfect velvet fabric you can check out our collection which has a variety of colors and textures to choose from.
Crafting your own DIY Velvet Trees can be a wonderfully creative and rewarding activity, especially during the holiday season. These luxurious decorations bring a touch of elegance and warmth to any space, and the best part is, they're surprisingly easy to make! If you love the idea of high-end, store-bought quality at a DIY price, then this project is perfect for you.
Let's discuss the detailed steps to create these stunning velvet trees, and I’ll share some tips and tricks to make the process smooth and enjoyable.
Material you need for Crafting Velvet Trees
- Luscious Velvet Fabric
- Foam Cone
- Hot Glue Gun and Glue Sticks
- Scissors
- Optional Embellishments
How to create your own luxurious velvet trees: A Step-by-Step Guide
Step 1. Measure and Cut
Unfurl your chosen velvet fabric and determine the length you need. A good rule of thumb is to have the fabric reach slightly past the base of the foam cone, with enough extra to tuck underneath for a clean finish. Don't be afraid to cut a bit more than you think you'll need – you can always trim the excess later.
Start by preparing your velvet fabric. Depending on how many trees you're making and their sizes, the amount of fabric needed will vary. For typical 8", 10", and 12" trees, a quarter yard of fabric should suffice for all three. Cut the velvet into strips approximately 1"-2" wide along the length of the fabric. The number of strips needed will depend on the height and number of cones you're decorating; typically, 2-3 long strips per cone should be enough.
Find out all the details on Master the Art of Cutting Velvet Fabric?
Step 2. Attaching the Fabric
The actual crafting begins by attaching your fabric to the cones. Start at the bottom of the cone, applying a strip of hot glue horizontally around the base, and press the end of a fabric strip into the glue. Ensure the fabric overlaps slightly at the bottom to cover the base completely. This overlapping part can later be glued to the inside of the cone for a neat finish.
Continue wrapping the fabric around the cone, placing a line of glue every few inches and overlapping the previous layer of fabric slightly to prevent the cone from showing through. The fabric may bunch or roll as you go; this adds to the texture and charm of the finished product. As you reach the top of the cone, you might need to cut the strips narrower to fit the tapering shape. Once you reach the tip, trim any excess fabric and secure the end with glue.
Step 3. Finishing Touches
Once the fabric is fully attached, your velvet tree is essentially complete. However, there are a few additional tips and variations to consider. If your fabric is stretchy, pull it taut as you glue to ensure it adheres properly without sagging but be cautious not to stretch it excessively as it may distort the shape or not stick well. Experiment with different colors of velvet—traditional greens and reds for Christmas or unexpected hues like pink, blue, or metallic for a modern twist.
Step 4. Placement and Styling
These velvet trees look stunning as a centerpiece on a holiday table, on a mantelpiece, or even in a foyer to greet guests. They can be grouped in varying sizes and colors for a dramatic effect or arranged in a line with single-color trees for a more sophisticated look. Consider adding embellishments such as small ornaments, glitter, or even lights for additional sparkle.
Step 5. Conquer the Top
Here, you have two options for finishing the top of your tree:
Folded Finish
Fold the excess fabric inwards towards the center of the cone. Apply a small dab of hot glue to secure the folded fabric in place. This creates a clean and finished look.
Pointed Finish
If you prefer a pointed top, cut a small triangle from the excess fabric. Carefully tuck the triangle underneath the top point of the cone and secure it with a small dab of hot glue. This option requires a bit more precision but creates a classic pointed tree silhouette.
Step 6. Secure the Bottom
Once you've finished wrapping the fabric and addressed the top, it's time to secure the bottom edge. Carefully tuck the excess fabric underneath the base of the foam cone. Apply a thin line of hot glue along the underside of the base to hold the fabric in place. Press firmly for a few seconds to ensure a secure bond.
Embellish Away (Optional):
Now comes the fun part. Here are some ideas to inspire your festive spirit:
You can use a few jingle bells onto the thin thread and hot glue them to the tree for a touch of auditory delight. Imagine the soft tinkling as you walk by your creation!
You can also craft a star topper from felt or glitter foam. Cut out two-star shapes and glue them together with a bit of ribbon sandwiched in between. This creates a dimensional star that can be hot glued to the top of your tree.
For a touch of whimsy, consider adding small felt snowflakes or glittery berries hot glued amongst the "branches" of your tree.
Pro Tip
Use a light touch with the embellishments – you don't want to overwhelm the elegance of the velvet fabric.
- Display Your Creation with Pride!
Congratulations!
You've just crafted a stunning DIY velvet tree that's sure to become a cherished holiday decoration for years to come. Find the perfect spot to display your creation – a side table, mantelpiece, or even as part of a festive centerpiece. Imagine a cluster of velvet trees nestled amongst twinkling fairy lights and surrounded by wrapped presents – pure holiday magic!
Creating these velvet trees is not only a fun and easy project but also results in elegant, high-end-looking décor that you would be proud to display. By choosing different fabrics and sizes, you can customize the trees to fit any décor style or color scheme, making them versatile for various occasions beyond just the holiday season. Engage in this delightful crafting experience and enjoy the beauty and personalization it brings to your home décor.
Other ways to use Velvet Fabric
The possibilities don't end with trees! The techniques used to create these delightful decorations can be applied to craft a whole menagerie of festive creations:
- Festive Gnomes: Use scraps of velvet fabric and felt to create adorable little gnomes with pointed hats – perfect for adding a touch of whimsy to your holiday décor.
- Jolly Santas: Craft miniature Santa figures using red velvet fabric and white felt for the beard and trim. These little Santas can be used as ornaments or scattered around your holiday display.
- Gift Boxes Galore: Velvet fabric scraps can be transformed into beautiful gift boxes for small presents. Add a touch of ribbon and a sprig of holly for a truly unique and personalized touch.
Read on to find out more about Can Velvet Be Used for Curtains?
Conclusion: Where to Buy Velvet Fabric
The star of the show, of course! Ice Fabrics has a collection of velvet fabrics that is available in an array of colors, from classic holiday hues like emerald green and rich burgundy to playful pinks and shimmering golds. The choice is yours! Consider your existing décor for a cohesive look, or pick a variety for a vibrant forest effect.