
Creating your own wrap dress is an empowering and creative journey into the world of fashion design, one that offers endless possibilities for customization and personal flair. The wrap dress, famously popularized by Diane von Fürstenberg in the 1970s, has stood the test of time, celebrated for its versatility, flattering fit for every body type, and the ease with which it can be styled for various occasions.
What is a Wrap Dress?
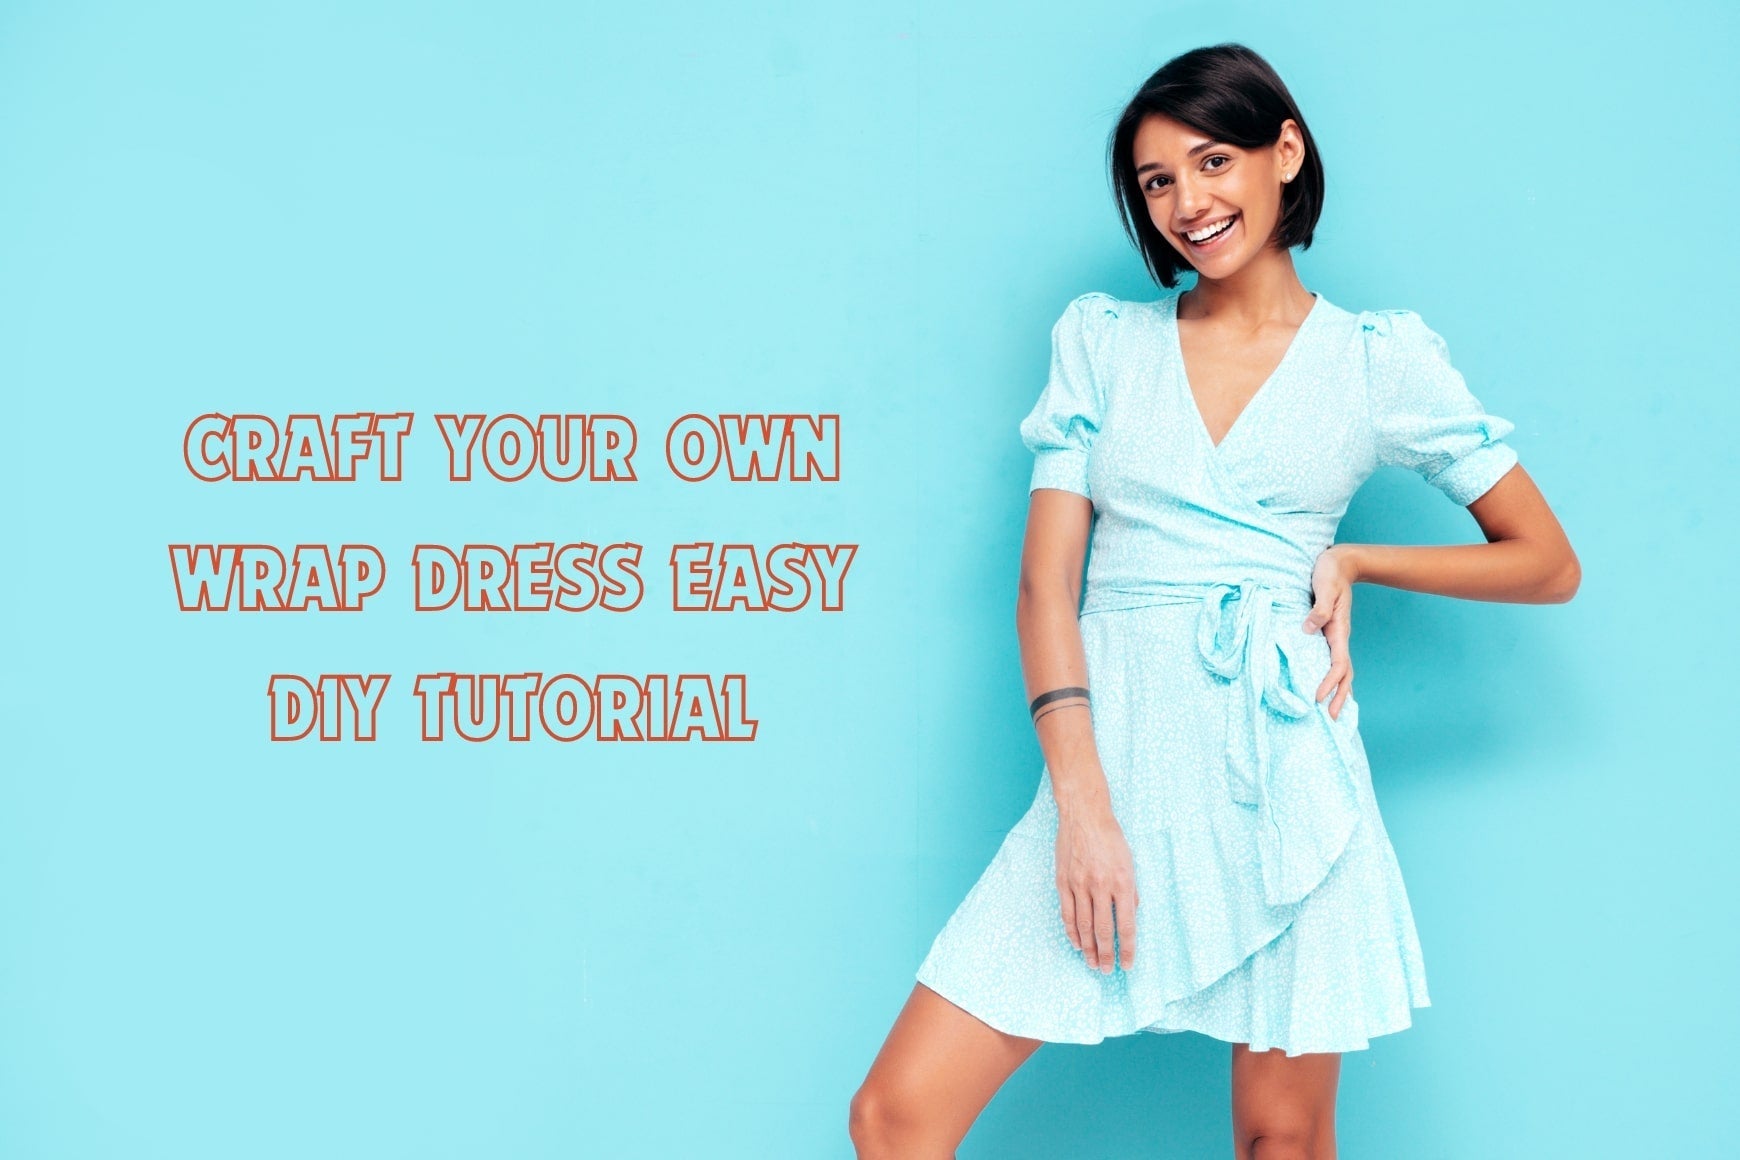
A wrap dress is a timeless wardrobe staple for girls, featuring a front closure formed by wrapping one side across the other and tying the fabric at the waist or back. This chic, feminine dress flatters every figure, offering a customizable fit that accentuates curves and boosts confidence.
It's crucial to appreciate why the wrap dress has remained a beloved staple in the fashion world. Its design cinches at the waist, enhancing the body's natural curves, while the A-line skirt flatters the lower half, making it the best choice for both casual and formal settings.
What Body Type is a Wrap Dress Good for?
As for who looks best in a wrap dress, the beauty of this design is its universality. Wrap dresses are incredibly flattering on virtually all body types. Their adjustable waist ties and flowing fabric accentuate the waist, providing a stunning silhouette that complements both curvy and slim figures.
For those with an hourglass shape, the wrap dress naturally highlights the waist, enhancing the body's natural curves. Meanwhile, those with a more rectangular or apple shape will find that the wrap dress creates an illusion of curves, thanks to its cinched waist and voluminous skirt. Ultimately, the wrap dress is a versatile piece that can elevate anyone's wardrobe, offering a tailored fit that looks custom-made for every body type.
The customizable wrap element allows for an adjustable fit, making it a forgiving choice for the dynamic female form. Additionally, its construction is surprisingly simple, making it an ideal project for both novice and experienced sewers alike.
Guide on How to Sew Wrap Dress?
Materials Needed
Before starting the sewing process, it's essential to gather all the necessary materials. Here's what you'll need:
- Fabric of your choice (preferably a lightweight and flowy material like rayon, cotton, linen, or jersey)
- Sewing machine
- Matching thread
- Scissors
- Measuring tape
- Pins
- Fabric chalk or disappearing fabric marker
- Iron
- Wrap dress pattern (available online or you can create your own)
Step 1: Taking Measurements
The key to creating the perfect wrap dress lies in accurate measurements. Begin by measuring your bust, waist, hips, and the length from your shoulder to your desired hemline. It's crucial to take these measurements while wearing the undergarments or shapewear you plan to pair with the dress to ensure a precise fit.
Step 2: Choosing the Fabric: What is the Best Fabric for Wrap Dress?
The journey begins with selecting the right fabric. For the wrap dress, Rayon Challis is an exemplary choice due to its lightweight, breathable qualities, and graceful drape that complements the fluidity of the dress's design.
When choosing fabric, consider the season and the occasions you plan to wear the dress. While Rayon Challis is perfect for a breezy summer or spring dress, you might opt for something heavier, like a knit or jersey, for cooler months. Aim for 3-4 yards of fabric, depending on your size and the desired length of the dress. Jersey knit, in particular, is praised for its stretch and softness, making it ideal for a dress that requires a snug fit without compromising on comfort.
Discover even more about Best Fabric for Making Paperbag Waist Skirt.
Step 3: Cutting the Fabric
Using your measurements and the wrap dress pattern as a guide, carefully cut out the fabric pieces for the dress. Be sure to follow the cutting lines accurately to ensure proper fit and symmetry. Remember to leave seam allowances as specified in the pattern instructions.
Step 4: Sewing the Bodice
Begin by sewing the bodice pieces together, following the pattern instructions. This typically involves sewing the front and back bodice pieces along the shoulder seams and side seams. Once the bodice is assembled, finish the raw edges with a serger or zigzag stitch to prevent fraying.
Step 5: Adding Sleeves (Optional)
If you prefer a wrap dress with sleeves, now is the time to attach them to the bodice. Align the sleeve pieces with the armholes of the bodice, pinning them in place before sewing. Be sure to ease any excess fabric around the curves to ensure a smooth fit.
Step 6: Creating the Wrap Skirt
Next, it's time to work on the wrap skirt portion of the dress. Depending on the design of your wrap dress, this may involve cutting two skirt panels or a single panel that wraps around the body. Follow the pattern instructions for the skirt, ensuring that the length and width match your measurements.
Step 7: Attaching the Skirt to the Bodice
With the skirt panels cut and ready, carefully align them with the bottom edge of the bodice, right sides together. Pin the skirt to the bodice, distributing any gathers or pleats evenly for a smooth finish. Stitch the skirt to the bodice, making sure to reinforce the waist seam for durability.
Step 8: Finishing Touches
Once the dress is assembled, take the time to press all the seams with an iron to ensure a polished look. Hem the bottom edge of the dress to your desired length, and finish any remaining raw edges with a serger or zigzag stitch. Finally, try on the dress to make any necessary adjustments to the fit, such as taking in the side seams or shortening the hemline.
Step 9: Adding Closures
To complete the wrap dress, you'll need to add closures to secure the garment in place. Common closure options include ties, buttons, or snaps, depending on your preference and the style of the dress. Sew the closures onto the dress according to the pattern instructions, making sure they are securely attached.
Step 10: Final Fitting and Adjustments
Once all the components of the dress are in place, it's time for a final fitting. Put on the dress and assess the fit and comfort level. Make any necessary adjustments to ensure the dress fits snugly but comfortably, allowing for ease of movement.
Expand your knowledge on How to make a Tutu Skirt?
Conclusion
Congratulations! You've successfully crafted your very own perfect wrap dress from start to finish. With its flattering silhouette and personalized touches, this DIY creation is sure to become a wardrobe staple for years to come. Whether you're attending a special event or simply looking for a chic everyday ensemble, your handmade wrap dress is guaranteed to make you look and feel fabulous. Enjoy wearing your one-of-a-kind creation with confidence and style!