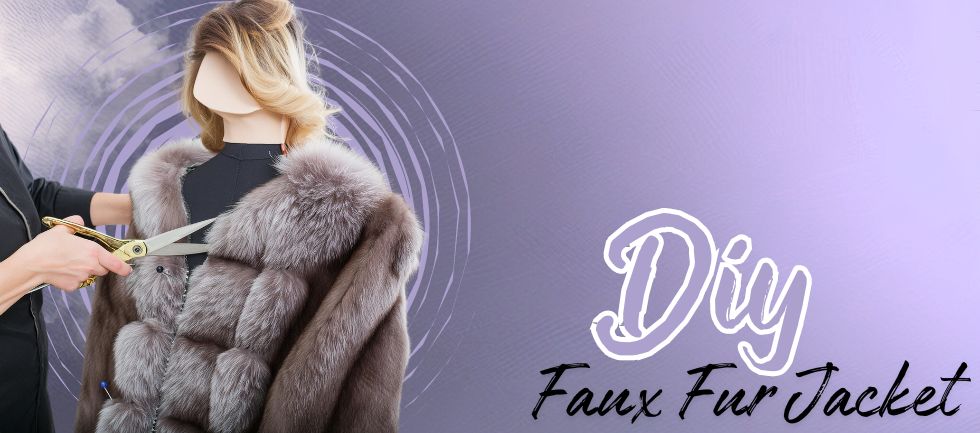
If you've been following fashion trends, you've likely noticed that fur is making a statement this year. From fur scarves to fur purses, this fuzzy fashion trend is everywhere.
However, a faux fur jacket not only does it make a bold fashion statement, but it's also incredibly warm and cozy. Gone are the days when fur was reserved for fancy occasions; now, it's the newest streetwear staple, effortlessly paired with jeans and sneakers for a casual chic look.
As the Winter months roll in, bringing with them cold weather and snowstorms, it's the perfect time to embark on a DIY project. Why not try your hand at creating your own faux fur jacket? While the idea of making something with a lining may seem daunting, it's essentially just constructing a simple jacket twice and then sewing the two layers together.
This pattern is particularly suited for beginners, as it doesn't involve closures or zippers. However, if you're bracing for extra chilly days, you can easily add hooks to keep the jacket closed.
Material you need
You can find all the materials you need for this project from any of the online stores but you must shop for fabric from Ice Fabrics. And the best part? The total cost of this jacket is under $30—a real steal when it comes to fur coats! So, grab your supplies and follow along with the sewing tutorial below to have a cute jacket ready for your next dinner outing on a cold night or to make a bold statement with your everyday look.
Gather Your Materials
- 1.5 yards of Rabbit Dark Gray Faux Fur ( check our faux fur collection to buy this beautiful piece).
- 1.5 yards of Satin Lining (60”)
- Matching thread
- Sewing machine
- Scissors
- Paper, pencil, and tape for pattern-making
- Measuring tape
- Pins
Create the Pattern
Begin by assembling your pattern using paper and tape, following the provided instructions. Adjust measurements accordingly based on your size. Once the pattern is ready, lay it out on the faux fur fabric and lining, pin it down, and carefully cut out each piece, ensuring you have one BACK, two FRONTs, and two ARMs. Remember to place the BACK pattern piece on the fold of the fabric.
Sew the Jacket Shell
Start sewing by joining the FRONT pieces to the BACK piece at the shoulder seams, with the furry sides facing each other. Sew along the seams, leaving a ½” allowance. Once the shoulder seams are secured, attach the ARM pieces to the armholes, sewing along the curved edges.
Fold the jacket shell so that the fur is on the inside and the arms are folded in half. Align the bottom edges of the arms and side seams, then pin and sew them together, maintaining a ½” seam allowance. Repeat these steps for the lining fabric to create a matching jacket shell.
Attach the Lining
To attach the lining to the fur jacket, place the fur jacket with the fur facing out. Turn the lining inside out and position it above the fur, aligning the neck, opening, and bottom edges. Pin the two layers together and sew along the seams, leaving a small opening at the bottom for turning the jacket right side out later.
Complete the Sleeves
Pull the fur arms out of the lining so they are inside out. Align the sleeves on each arm, ensuring they haven't twisted. Fold the last 2” of the lining arm into a cuff and insert it into the fur arm. Pin the fur to the top layer of the lining and sew along the seam. Repeat for both arms.
Final Touches
Turn the jacket right side out through the opening left at the bottom. Sew up the bottom with hand stitching or a machine. Trim any loose threads and give your jacket a final press to smooth out any wrinkles.
Wrap up
Congratulations! You've successfully created your own faux fur jacket. If you're heading out for a night on the town you can wear this beautiful jacket. Enjoy the compliments and the satisfaction of wearing a piece you made with your own hands.