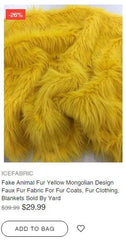
Now the winter is coming, and we are thinking about how to wrap up ourselves in cold weather or upgrade our home with Faux fur fabric. Making yourself a beautiful faux fur project now means it'll be ready to wear in winter. However, if you ask us, it's more fun to make yourself cozy winter pieces than it is to buy them from us and make your winter warm.
This is a link to Buy Faux Fur Fabric.
Uses of Faux Fur Fabric
- Faux Fur Vest Sewing Pattern.
- Faux Fur Reading Pillow Pattern.
- Easy DIY Faux Fur Throw Blanket.
- Faux Fur Jacket sewing pattern.
- Faux Fur Sheepskin Rug pattern.
- Flannel and Faux Fur Christmas Stocking Pattern.
1. Faux Fur Vest Sewing Pattern
Do you love to wear a soft and luxurious outer layer to keep you warm in the winter season, then a vest is the best choice. The vest is easily customizable; it looks (and fits) marvelous and works well with any cool-weather. This faux fur vest is lots of fun and easy to put together as well.
If so, Ice Fabrics have just mentioned the steps of how you can sew this gorgeous, long faux fur vest. Make it and style it with a little black dress to get a glamorous look.
STEPS TO MAKE A FAUX FUR VEST
- Take 1.5 meters of long pile faux fur and the same amount of fabric for lining
- Take matching threads.
- Sewing machine, scissors & pins.
- Trace half the sample's outline vest directly onto fun fur and then folded the pile in half and cut out the whole vest.
- Cut the vest piece out of the fun fur.
- Carefully use your scissors along with the fabric, parting the fur.
- Pin together the shoulder seams and tried on the fur vest.
- If you are satisfied with the shape of the fur piece, then trace it onto the lining material and then cut out the lining.
- Pin together the seams and first sewed closed the arrows under the armpits in both the lining and fur.
- Sew together the faux fur and lining (right sides in), leaving the shoulders and an opening at the bottom to be able to flip it right side out.
- With the vest turned right side off, sew closed the shoulder seams.
- The final step is sewing completed the opening at the bottom by hand.
Note: Faux fur is a little complex to work with. When cutting it, you should avoid giving your fur a lousy haircut.
Expend Your Knowledge: What Should I Look for in Faux Fur?
2. Faux Fur Reading Pillow Pattern
Faux fur is the best way to add color and texture to any room. Faux fur reading pillow is a source of joy. They can look very modest but at the same time also elegant.
These steps on making a reading pillow are comfortable and help you create a great decorative pillow for reading a book.
Picking sewing of Faux fur is a little bit complicated for beginners, but no need to worry our informative sewing steps give you quick assistance.
There are several types of faux fur and texture available at Ice Fabrics. You can order according to your desire.
STEPS TO MAKE A FAUX FUR READING PILLOW
- Take s scissor, pins, thread and zipper to make your fur pillow covers.
- Choose the pillow form in the desired size.
- Measure to calculate an amount of fabric.
- Using marker, mark cutting line for two sides of the pillow cover,
- Cut fur, one layer at a time and from the back carefully and spin the backing of the fabric without cutting fur.
- Decide which side zipper will be on.
- Tuck underfur and pin zipper on one side of the piece of the fur.
- Using a zipper foot, sew on the zipper.
- Fold fur at the zipper, so right side is together and zipper at top tuck pin and sew two sides begging at the zipper.
- Make sure zipper is unzipped part way, pin and sew the end opposite zipper.
- Turn the right side out, stuff the pillow, and zipped close to enjoy your pillow.
Discover More: Is it Ok to Wear Fur in the Rain?
3. Faux Fur Jacket Sewing Pattern
The faux fur jacket is easy to make and is one of the most beginner-friendly fake fur sewing projects on this list. Just select a faux fur color and look at simple steps to customize the jacket to add a little touch of charm to your look with a warm and cozy feel.
STEPS TO MAKE A FAUX FUR JACKET
- First, you'll need to cut the pieces for a jacket back and jacket front, and two sleeve pieces.
- Cut all of them out of the fur and the lining.
- Add about 1/2 inch to the sides of each lining piece (making it 1/2 an inch greater than the fur all the way around.
- Sew the jacket back fur and lining pieces together at the neckline and the bottom of the jacket. Then turn right side out.
- Sew your jacket front fur and lining pieces together at the neckline, down the front, and along the hem.
- Stitch your sleeve fur and lining together at the wrist.
- With the right sides of the fabric, line up the top of the sleeve turn and the armhole's top. Pin together. Then carry on either side to pin the sleeve to the armhole.
- Now stitch in place across the entire arm opening.
- With right sides together, stitch the sides and sleeves up with a straight stitch.
4. Easy DIY Faux Fur Throw Blanket Pattern
If there's one thing we know all about faux fur, it's that an elegant Faux Fur throw blanket will give you the coziest vibes in the winter season.
There's nothing better than getting comfortable and warm with a faux fur blanket, and it's a fast fake fur sewing project that takes half an hour to make.
STEPS TO MAKE A DIY FAUX FUR THROW BLANKET
- 1 1/2 yards 60″ wide faux fur.
- 1 1/2 yards 60″ wide dark brown silk fabric for the backing.
- Sewing machine.
- Take sewing machine needle.
- Take a heavy-duty thread, quality fabric scissors, and metal clips
- Cut both materials to match in size about 60″x 60″.
- Use scissors and clip the fur shorter around the outside edges.
- Put the front side of the faux fur material and the front of the backing fabrics together.
- Using the metal clips, clip the four corners together and then clip the sides.
- Using a 3 or 4 stitch setting, sew around the edge of your DIY faux fur throw, leaving about 8″ unstitched at the end.
- Cut corners as close as possible without getting too close to the seam to protect them from being too large.
- Turn the faux fur into the right side and sew it on the open area with a whip by hand.
Read More About: Can you Steam Clean Faux Fur?
5. Faux Fur Sheepskin Rug Pattern
Faux fur fabric is a trendy fabric for blankets and rugs. Faux fur sheepskin rugs have become super-popular but a little bit expensive. So making your own is an affordable way to save time and money as well.
Here at Ice Fabrics, we provide a detailed step-by-step process to make the sheepskin rug at your home.
STEPS TO MAKE A FAUX FUR SHEEPSKIN RUG
- Shop 3 yards of 64″ wide faux fur.
- Take Velcro strips and Hot glue.
- Take a mat you need for a rug.
- Layout the mat under the fur fabric and cut them to the same size (In our case, 5×7 feet.).
- Lay the faux fur face-down on the floor.
- Put the underlay on top and get them perfectly lined up. The underlay is anti-slip, so it'll stay in place pretty well while you work.
- Now fold back a corner of the underlay and hot glue the Velcro strips in the corner.
- Then put hot glue on the other half of the Velcro, and lay the underlay back onto the fabric so the Velcro gets glued to the fabric.
- You can add some more Velcro down the edges of the rug, too, for extra security.
6. Flannel AND Faux Fur Christmas Stocking
Christmas stockings are the perfect touch to holiday decor. They can be made as precious, gifted for a new family member. You can make your own stylish Christmas stocking to upgrade your home at Christmas.
We give you complete step by step details to make a Christmas stocking.
STEPS TO MAKE A FLANNEL AND FAUX FUR CHRISTMAS STOCKING
- 2/3 yard faux fur (makes two stockings – use 1.5 yards for five stockings) – shop faux fur fabric by the yard at Ice Fabrics.
- 1 yard 1/2″-3/4″ wide linen or twill ribbon (each stocking required 8″).
- Sewing machine or serger and necessary sewing supplies.
- Download the stocking pattern download and assemble them.
- Cut two stockings (one right and one left) from the faux fur and two (2) from the flannel.
- When cutting the fabric using small snips to avoid cutting the fur pile.
- For a complete stocking with the flannel as the main fabric and the fur curved down at the cuff, be sure that the fur's direction is going from bottom to top when you cut the stocking pieces.
- Stockings with the fur as the main fabric cut the stocking shape with the fur lying from top to bottom.
- Set the two lining stocking pieces in front of you.
- Use the pattern piece to mark the loop located on the right side of one stocking piece.
- Cut an 8″ length of ribbon and form a loop.
- Pin the loop onto the stocking with raw edges slightly diagonal to the raw edge of the stocking.
- Place right sides of the stocking lining together; pin if desired.
- Sew, using a 1/4″-3/8″ seam allowance, from the top of the stocking down the front side, around the toe, bottom, and heel.
- Continue stitching up the backside of the stocking, leaving a 5-6″ opening for turning the stocking later.
- You will simultaneously secure the ribbon loop into the seam – it will be sandwiched between the two sides of the stocking.
- Connect the leading stocking to the lining. In this example, the lining (the flannel) inside out and the main fabric (the fur in this example) right side out, tuck the main stocking into the lining.
- Insert the main stocking into the lining until the top raw edges are even.
- Line up the back and front seams and pin the stockings together around the top raw edges. Sew together, being sure that the right sides are facing one another.
- Pull the right side of the stocking and its lining out through the opening.
- Sew the opening in the lining closed by hand – the stitching will not be visible on the finished stocking, but you can still use a slip stitch to make it nice and neat.
- Now, tuck the lining into the exterior of the stocking. Be patient and work the toe and heel of the lining entirely into place, smoothing out any bumps or wrinkles.
Note
Now the time to show your creativity with faux fur fabric like faur fur pom pom etc. We offer a wide range of beautiful faux fur fabrics, including long hair fur, short hair fur, fluffy fur, fur, shaggy fur, and much more.
You can get in touch with us at Social Channels i.e. Pinterest, Facebook, Instagram, etc.


